Hey there, I see you clicked on my DIY Oil Change guide and are ready to take the first steps into saving yourself some big bucks down the road. This is the first step towards being your own self-sufficient auto mechanic. Soon you are going to be pulling your motor apart and changing out camshafts and distributers. Ok, maybe we are getting a little ahead of ourselves but this is how it gets started and can lead to many fun projects. If that doesn’t spark your interest, at the very least it will save you some money. Let’s dig in!
You’ve bought all the supplies you need? You’ve double-checked them to make sure you are ready. If you haven’t, here is a link to my 8 Items Needed to Change Your Oil, which will work in conjunction with this DIY Oil Change Guide
Remember not all cars are the same and this is a general guide. Make sure that you understand the steps, as related to your car. There are numerous styles and locations of oil filters and many different locations for drain plugs. Make sure you know where your oil pan drain plug is! Do not drain your transmission when you are trying to drain your motor oil!
Do your own research!
DIY Oil Change Steps
- Step 1 – Warm Up Car
- Step 2 – Raise Car
- Step 3 – Verify You Are Ready
- Step 4 – Drain Oil
- Step 5 – Install Drain Plug
- Step 6 – Remove Oil Filter
- Step 7 – Install Oil Filter
- Step 8 – Refill Motor
- Step 9 – Start Motor
- Step 10 – Lower Car
- Step 11 – Check Oil Level
- Step 12 – Test Drive
Warm Up Car
First, warm your car up a little before swapping out the oil. This will allow the oil to flow out of the oil pan quickly. It doesn’t have to be hot just run it for a little while to get the oil warm. You can drain it cold it will just take a few extra minutes to drain the oil completely.
If it is hot use caution! Hot oil retains its heat and it doesn’t feel great as it runs down your arm. I know, I’ve been there trying not to drop the drain plug into the oil while also trying to get to my rags to wipe it off my arm as I am also trying to position the pan so that it doesn’t spill all over the floor.
Raise Car
Next, you will want to raise the front of your car. You can either drive it up onto ramps or lift it up with a jack.
Make sure you leave the car in park or, if it is a manual, in gear. Also, set the emergency brake and block the rear tires.
If you are using jacks, make sure you use the jack points of the car. Your owner’s manual should have the jack locations. Once in the air, you will want to secure your car with jack stands. Make sure that you put the jacks at a strong point of the car such as the frame.
Ramps are, by far, the easiest method; drive the car up onto the ramps, chock the rear tires, and you are good to go.
If you have a taller pickup, you may not need to do either option as you can usually slide underneath.
This is very important!
After you have done this test the car’s stability before going under! Give it a good shake to make sure it is stable, if not readjust everything until it is.
Verify You are Ready
Pop the hood and locate all the components you will be working on; this will help you keep a rhythm so you don’t have to stop halfway through and figure something out.
If there are any covers preventing access to an item, remove that now. As an example, my BMW has a cover over the drain plug that you must open in order to access it.
A little prep work is going to save you time in the long run.
Drain the Oil
Grab your oil pan and position it under the drain plug.
Note: if the drain plug does not face directly downward it will come out at an arc and the oil pan will need to be adjusted accordingly.
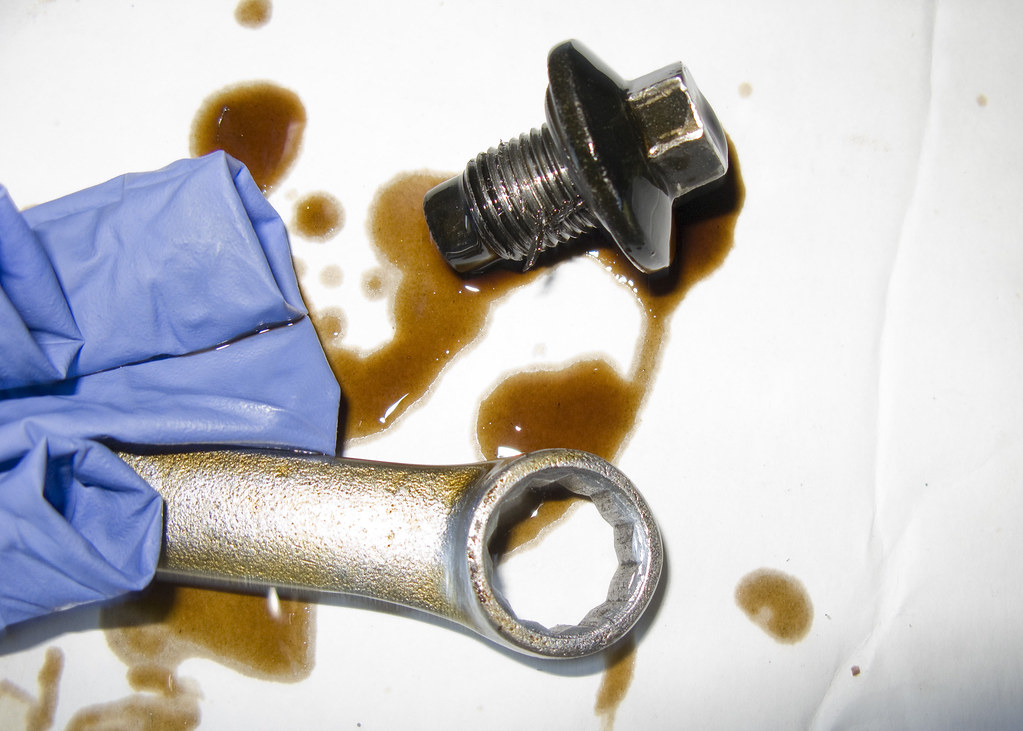
Drain the oil by removing the drain plug. As you reach the end of the threads be prepared to catch the plug. It is inconvenient to have to fish it out of your drain pan if you drop it.
Take note of the end of the drain plug. It should be magnetized and any ferrous metal filings will stick to this. Go ahead and make sure it is clean. If there is a large buildup of filings it could be an indication of premature engine wear.
If this is your situation, I would strongly advise taking it to your mechanic to have a professional take a look. Take a photo of the filings on the drain plug before wiping it clean so that you can show your mechanic and he can have an idea of what you observe. He may not be able to do much without being able to look for himself and he may want you to come in for another oil change, with him, after a certain number of miles.
Once this step is done do not start the car until you have put the new oil into the engine!
Install Drain Plug
Once the oil is drained, you should replace the seal on the drain plug. It is likely going to be a copper washer on the plug itself. If it is not on the plug it probably stuck to the oil pan, make sure you remove it. Place the new washer on the plug and install it into the oil pan.
Note: This plug has a specified torque on it, I highly recommend tightening it to the proper torque. You should be able to find this in your owner’s manual.
Remove Oil Filter
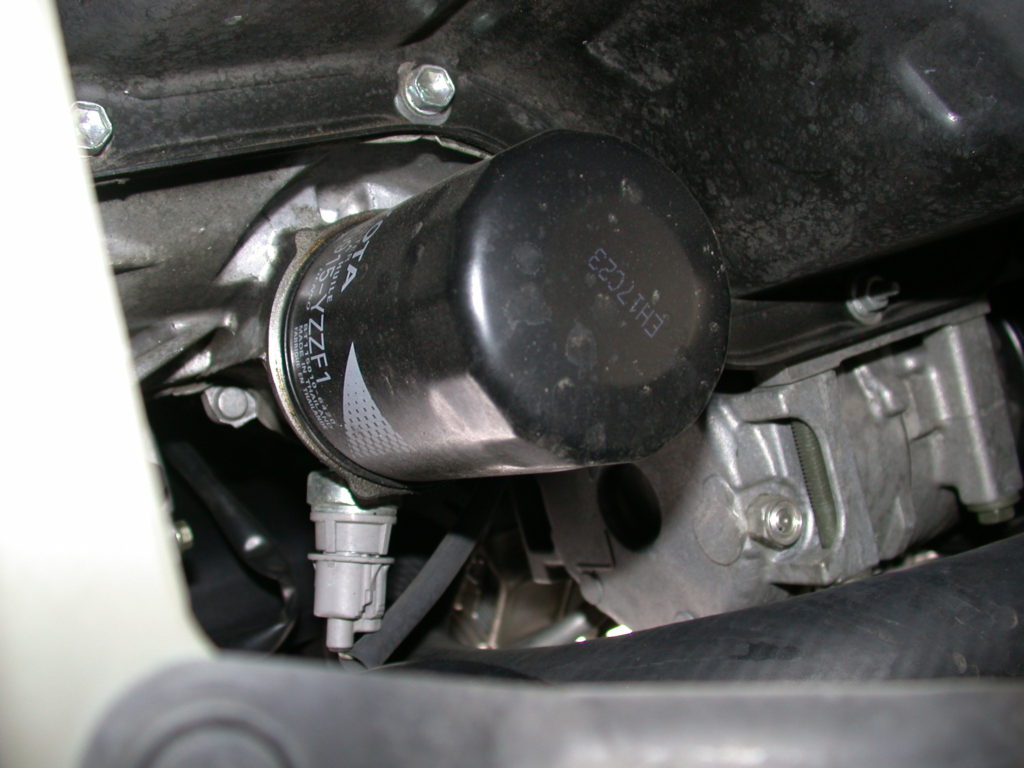
If you have a standard style oil filter, reposition your oil pan under it. Remove the oil filter and let the oil drain out. Before putting it to the side make sure all the gaskets are still on the filter. I have seen the oil filter leave the gasket stay in place on the engine. Make sure it is not, otherwise, this will cause the oil to leak out while the car is running. It may also hold long enough that you won’t see the leak on initial inspection. Use caution and make sure you remove everything you are replacing.
There are a few different styles of oil filters out there, some of which will require you to remove a cap and pull the filter out of the housing. Be aware of this and do a little research on your car before you begin the process.
Install New Oil Filter
Ensure that all gaskets are in place on the new filter. Once in place, open up one of your new bottles of oil, put a small amount of it on your finger, and lubricate the new gaskets. This will prevent the gasket from sticking to your filter housing when you remove it next time!
Most standard oil filters will have the instructions on how to tighten them on the side of the filter. Make sure you understand how much to tighten it, this will prevent it from backing out. Also, if you are super strong it will prevent you from damaging the filter while installing it.
Refill Motor
Almost to the finish line! You are now going to take all that fresh new oil and pour it into your baby!
Find the oil cap on top of the engine.
Again, make sure it is for motor oil and not the transmission, power steering, etc.
Ensure you know how much oil you need to put into the engine before beginning.
Oil containers should have a transparent sight, on the side, and markings for how much oil is left in the bottle. This will help you put the correct amount in the engine, especially if your engine requires an odd number such as 4.5 quarts.
If you purchased a funnel you will want that now.
Pour the correct amount of oil into the engine and replace the oil cap.
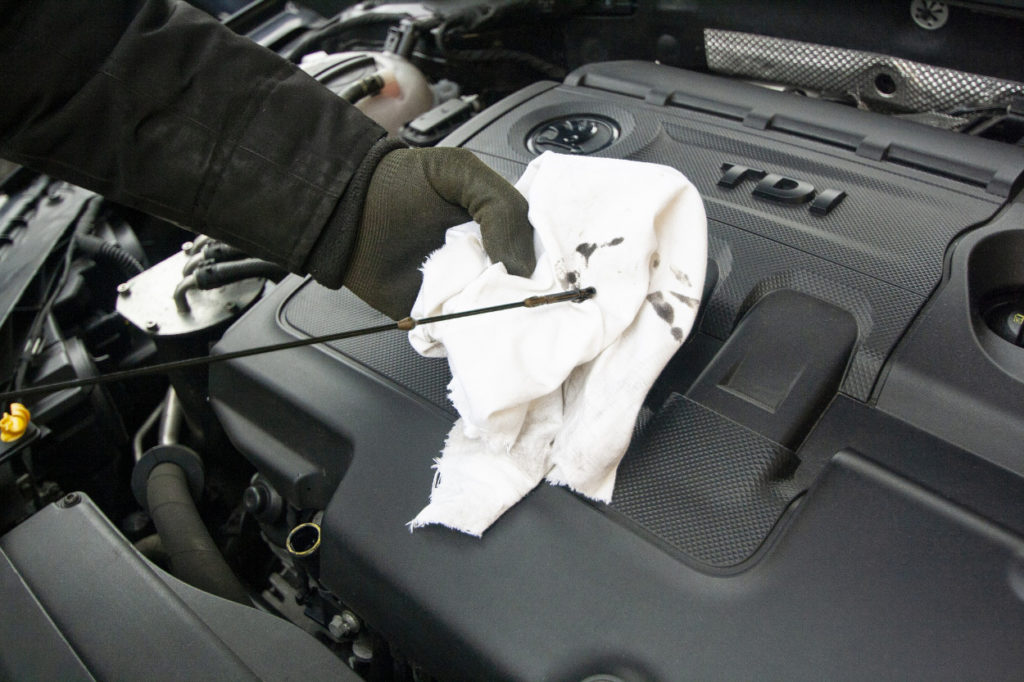
Check the dipstick to make sure you are between the marks. You may be slightly over with the recommended amount of oil; this is due to oil not being in the filter and filter passages. It should come down once you start the car.
Start Engine
Always do a quick double-check, make sure that you put everything back, move all the tools and the oil out away from the car, clean up any oil that got on the floor.
Once you’ve done your check go ahead and start the car. Wait just a minute to make sure your oil pressure comes up either by reading the gauge or by making sure the oil light doesn’t come one.
Pressure may not immediately come up. It may take a few seconds to refill the oil filter but if it does not come up shut the car off, verify everything is correct, and check the dipstick. Check under the car for any major leaks. Restart the car and give it a few more seconds.
Once running, get out and check to make sure there are no oil leaks under the car.
Go ahead and shut the motor off.
Lower Car to Ground
Everything checked out ok! Perfect, bring the car back to the ground and park it on a level surface.
Check Oil Level
Now that the car is back on the ground and on a level surface, check the oil level once more and make sure that you are in between the marks.
Note: Too much oil in the pan can cause the crankshaft to hit the oil as it is rotating. This will cause the oil to foam, which is bad!
Test Drive
Take the car around the block, this will build pressure in the engine.
Make one final check for leaks after the test drive.
If you forgot to ensure the gasket, for the old filter, was off the engine, you should find out now. I repeat this because it is important, don’t get to this point to find out you missed this step! It still could hold pressure with a doubled-up gasket and you wouldn’t know until it is too late!
I don’t say this to scare you away, from changing your own oil, just to ensure you know how important this is! Changing your oil is a task that you can accomplish!
Congrats! You have successfully completed the DIY Oil Change guide!
Clean up your mess and take the oil back to your auto parts store. You are now on your road to be your own mechanic!